Onviant Agent Dashboard
Login to your agent portal at onviant.brings.healthcare.
Click on Agent Dashboard:
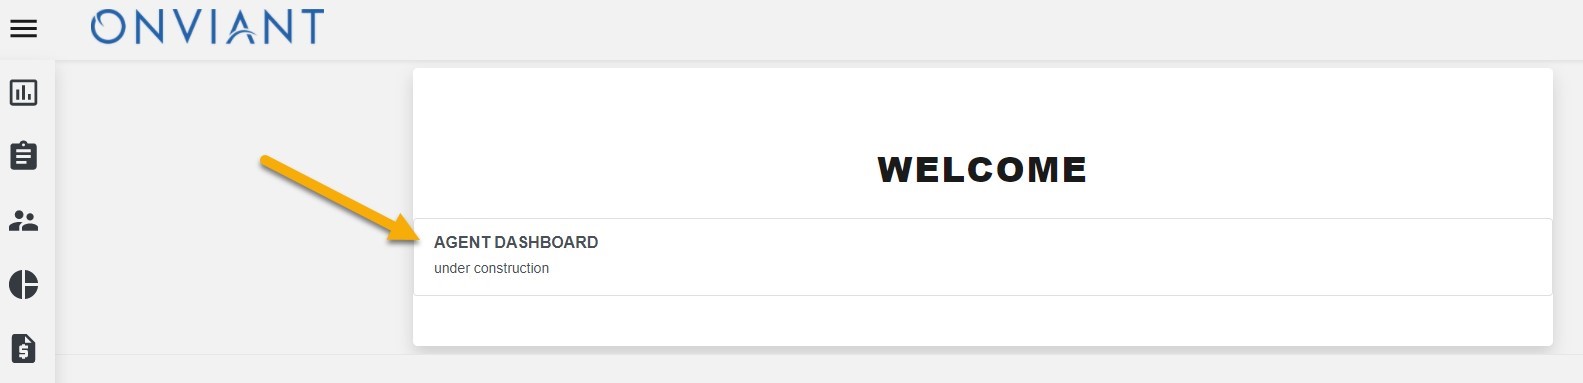
This is the Agent Dashboard:
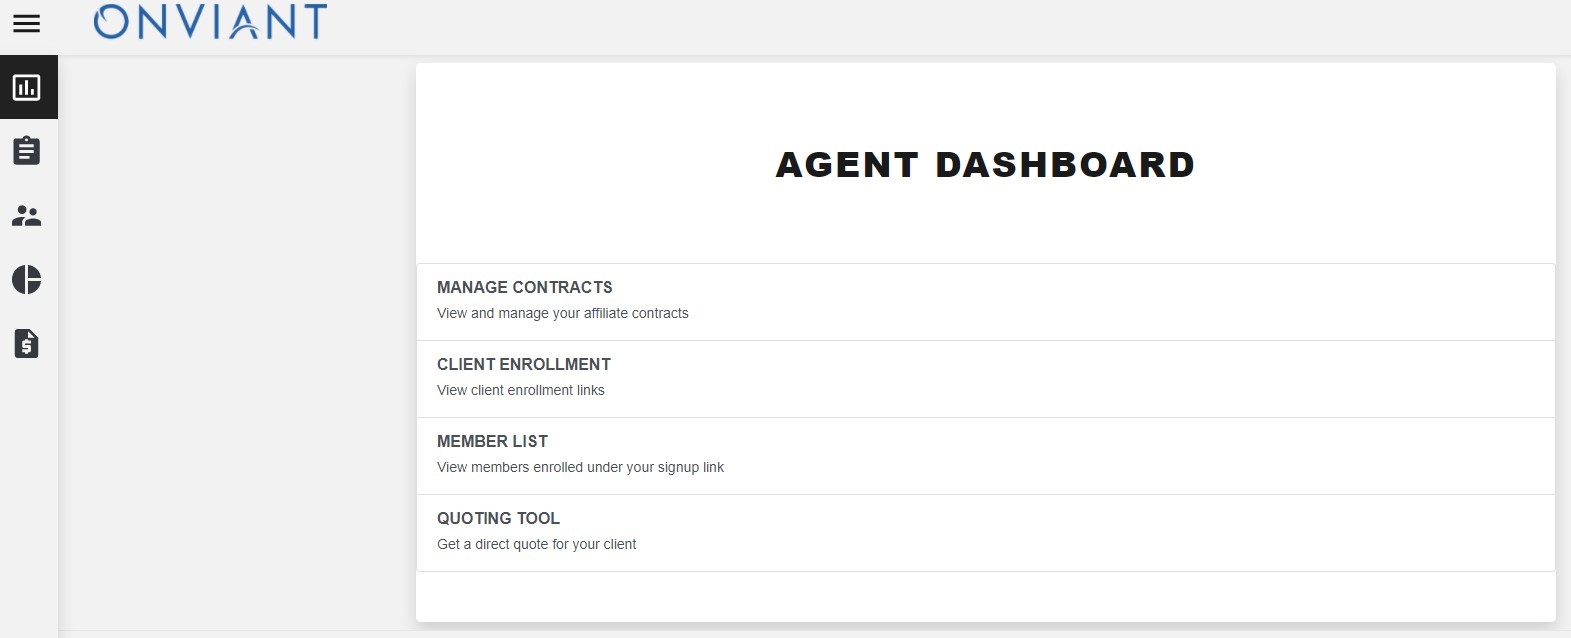
Manage Contracts Page
There are tabs for each organization the Agent is contracted with:
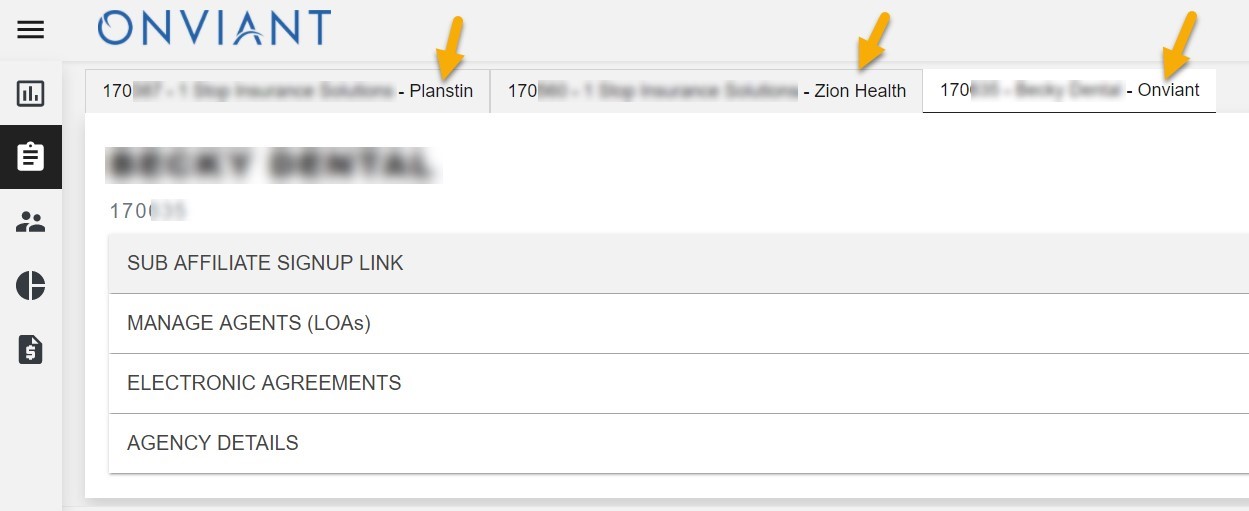
Sub-Affiliate Signup
Setting up a sub-affiliate contract below your contract:
1. Copy send link to new agent for them to register and sign in to complete contracting.
2. Download, complete schedule indicating commision level and email to broker@planstin.com

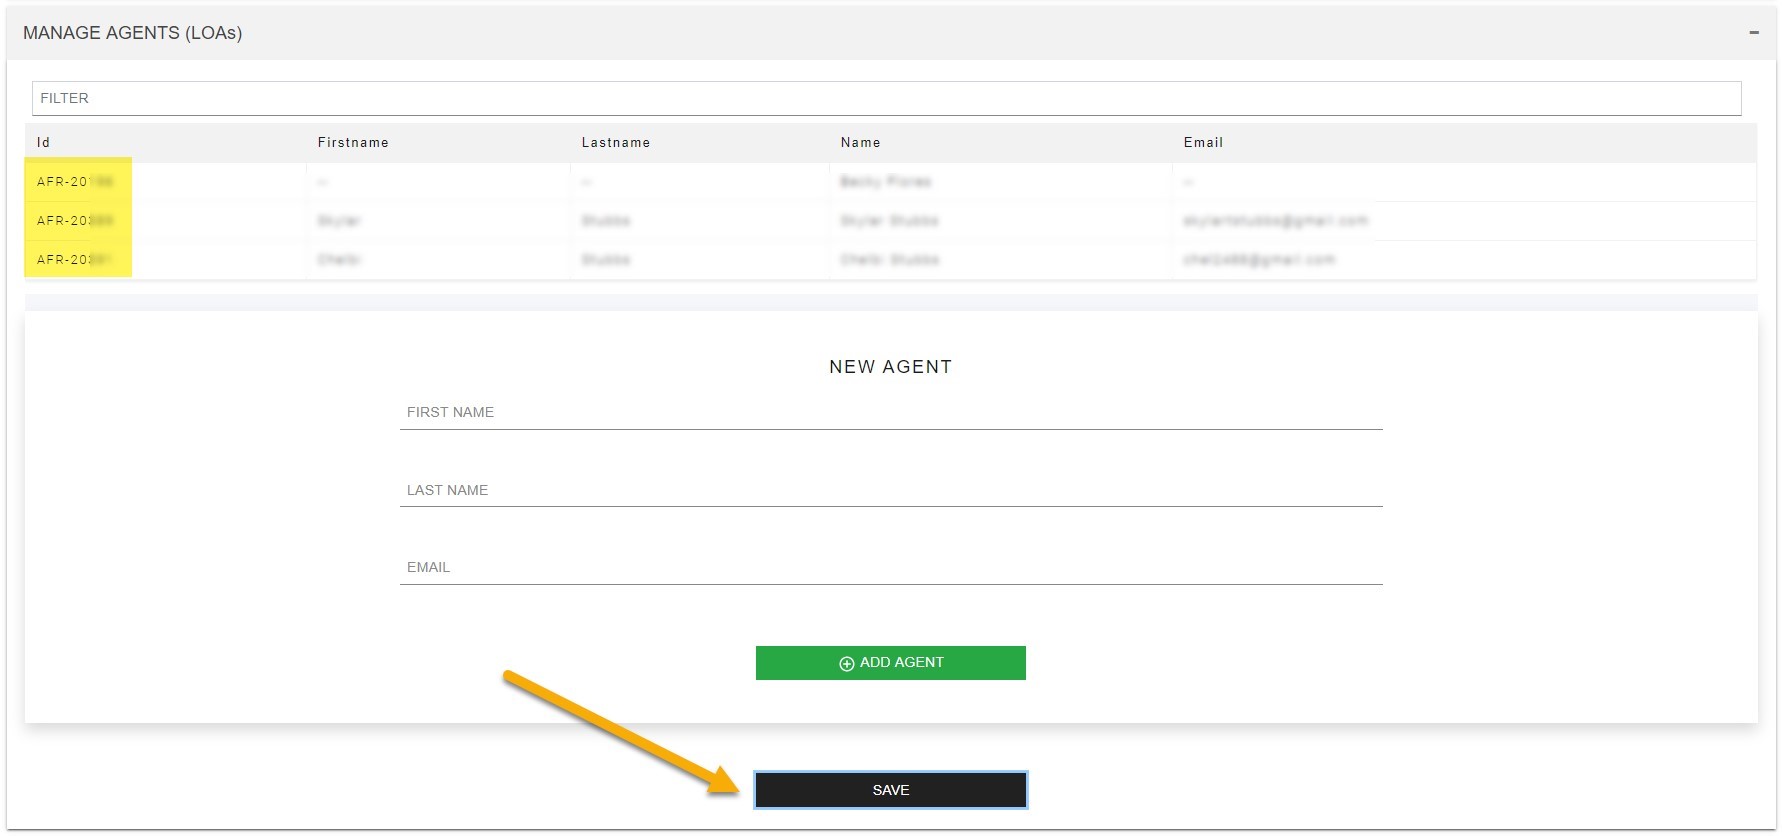
Manage Agents (LOAs)
Here you can add multiple LOAs to your contract. Add the agents one at a time and click the green “add agent” button each time after you have entered the info.
It is very important that you click black “save” button after you added all your agents. An AFR number (highlighted in yellow) generated after you click save means that it was successful.
Once this step is complete LOAs will automatically be emailed with a link to login to the dashboard and access their quoting and enrollment tool.
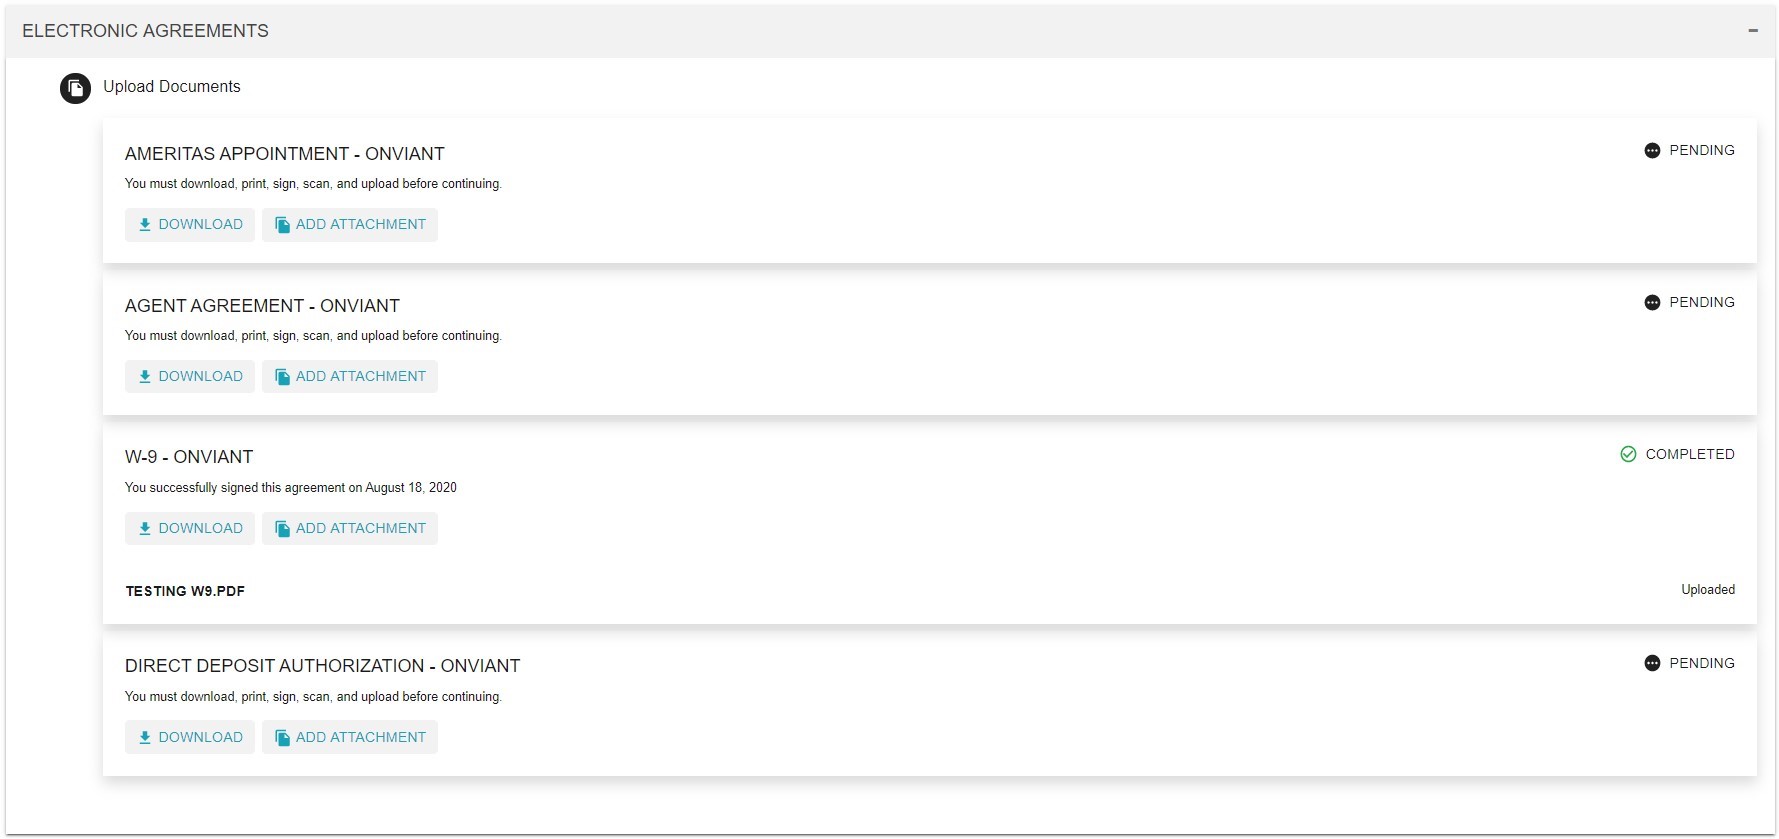
Electronic Agreements
Here you can see which contracts and agreements may need to be signed and uploaded:
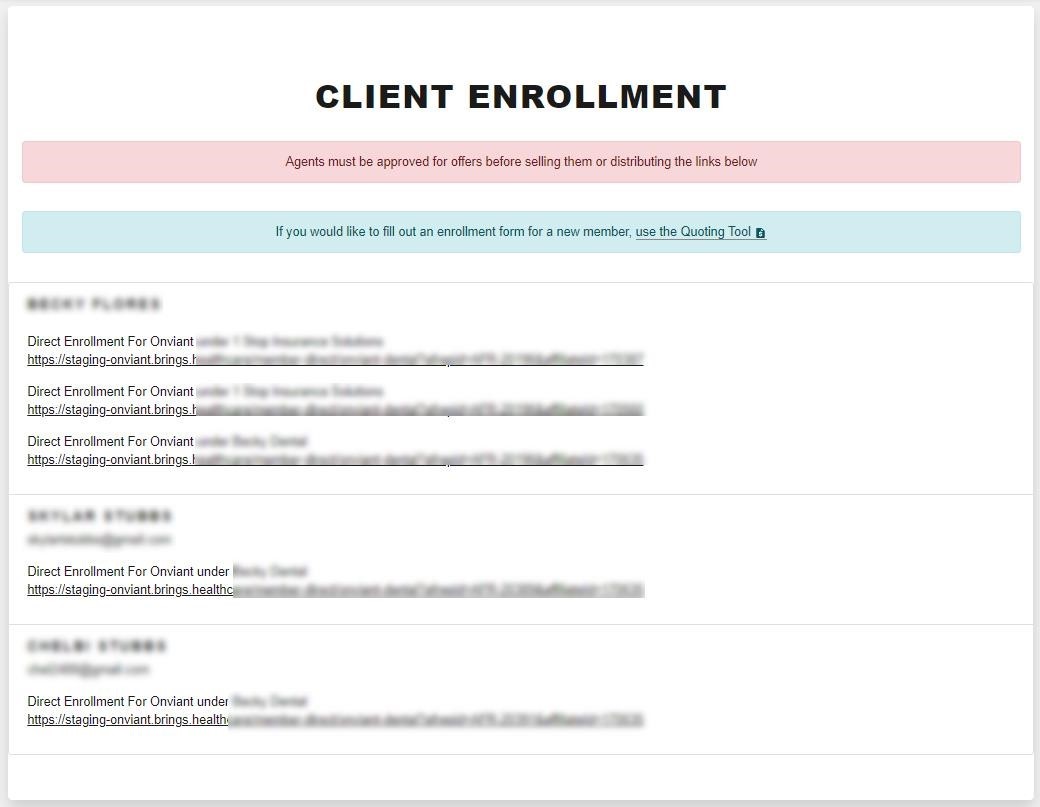
Client Enrollment
Here you can see the client enrollment links for yourself and each LOA on your contract. These are the links you would share with clients for the client to go through the enrollment process themselves. Each link is unique to the agent so they get attribution for the sale.
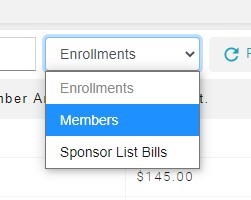
Member List
This is where you can see a running list of all enrollments under your contract.

Note that you can see different view by using the filter in the top right corner.
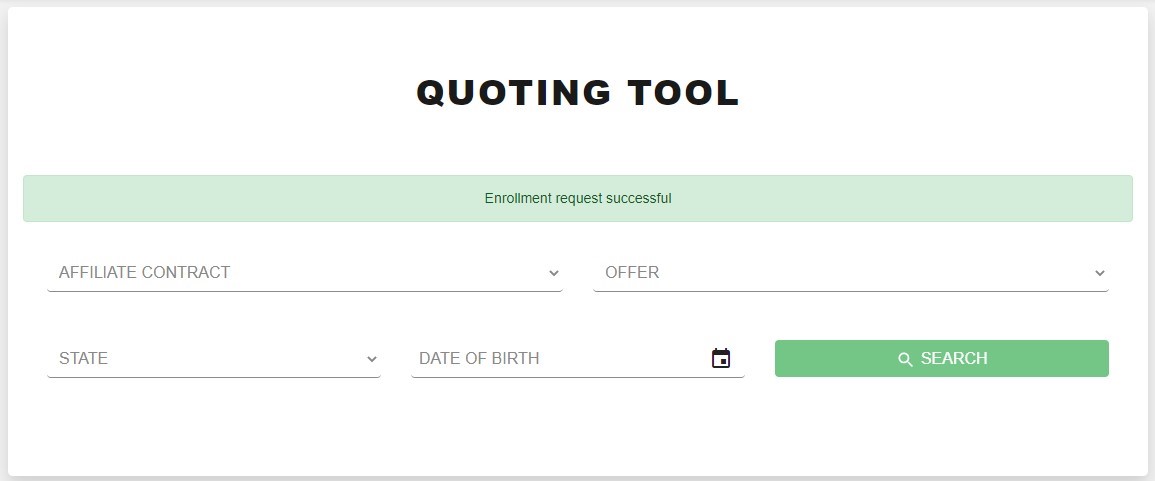
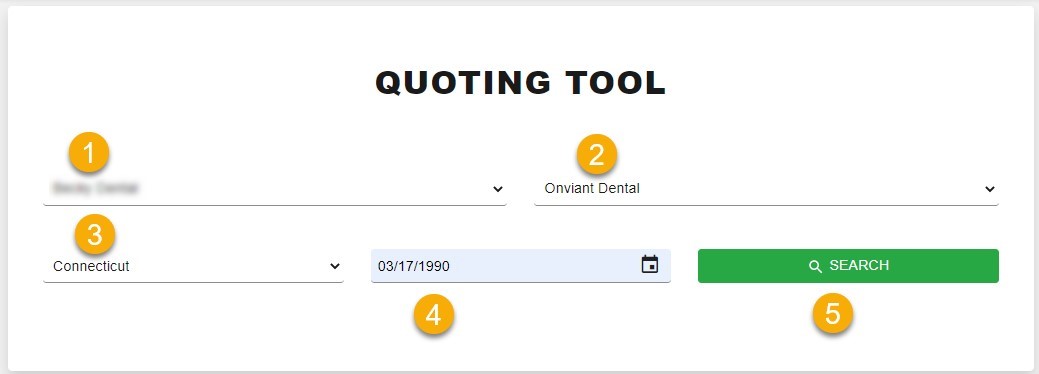
Quoting Tool
1. Select Contract
2. Select Offer (Onviant Dental)
3. Select client resident state
4. Select client DOB
5. Search
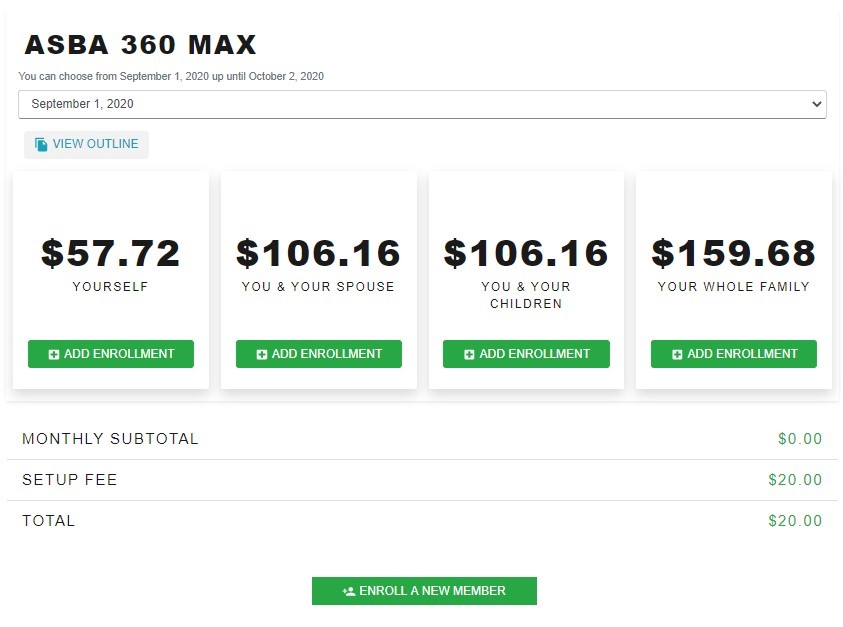
Select which plans and tier the client would like to purchase:
Once a plan and tier has been selected click “add enrollment” then click on “enroll a new member.”
After clicking enroll a new member you will be prompted to fill out all the personal information for the member and any dependents where necessary. The member has the option to add either a Credit Card or ACH for their payment info. Once all information has been entered click “create member”.

Quick Enroll Page
Here you will be prompted to choose an effective date and check the box that the member is agreeing to sign up for the offer. Once you’ve check the box you can now click “enroll.”
You be redirected to the quoting tool where a message will be displayed saying “Enrollment Request Successful.” You can now complete additional enrollments beginning with the quoting tool.