Agent Account Setup Instructions
Creating an agent account:
The following steps show you how to create your agent account.
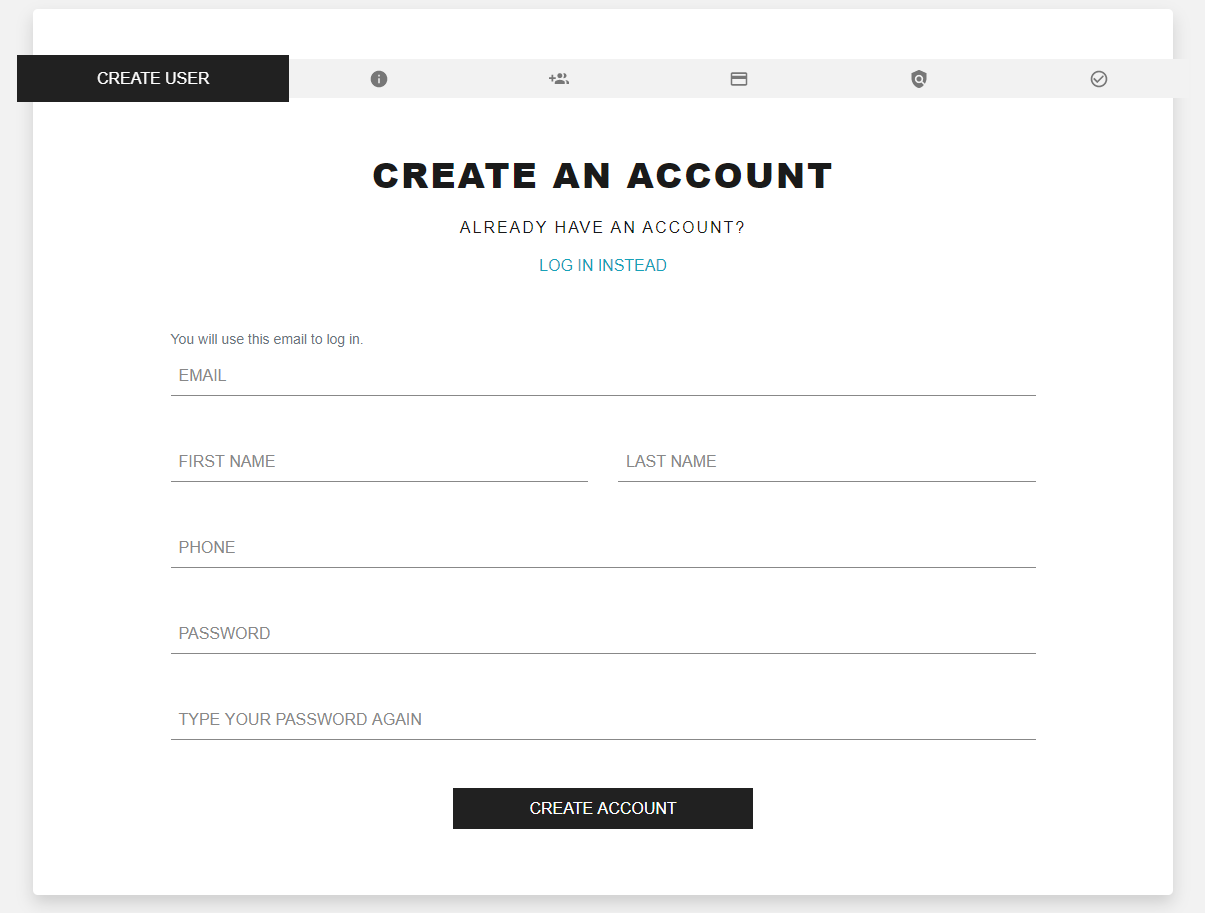
Step 1. After receiving the link from your up-line this should be the screen you will see. Please enter your personal information and create a password. Hit create account. Remember your username and password for logging-in in the future.
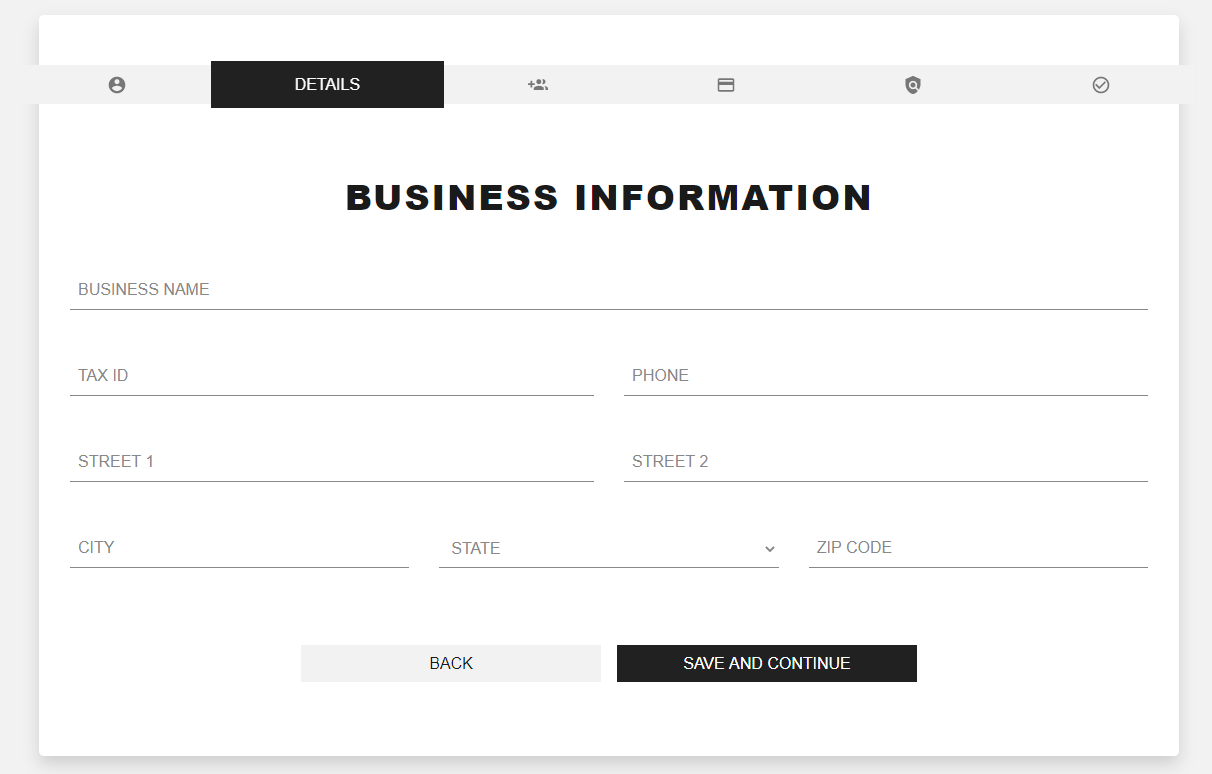
Step 2. Please continue the set-up process by entering your business information under the details tab. Please fill out all fields. Then select save and continue.
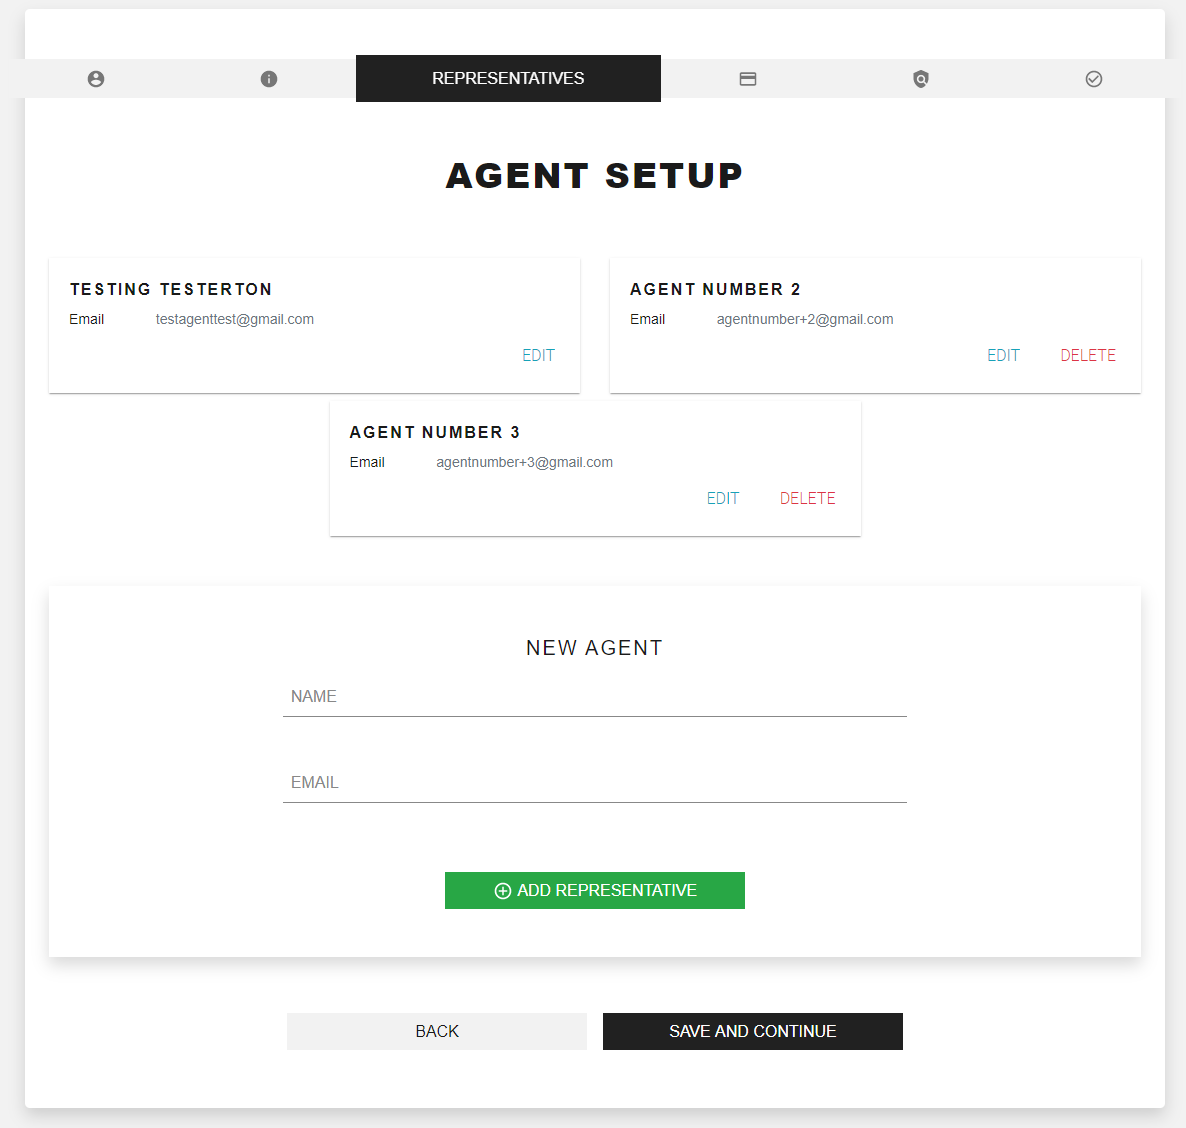
Step 3. You will automatically be added as an agent as you can see below.
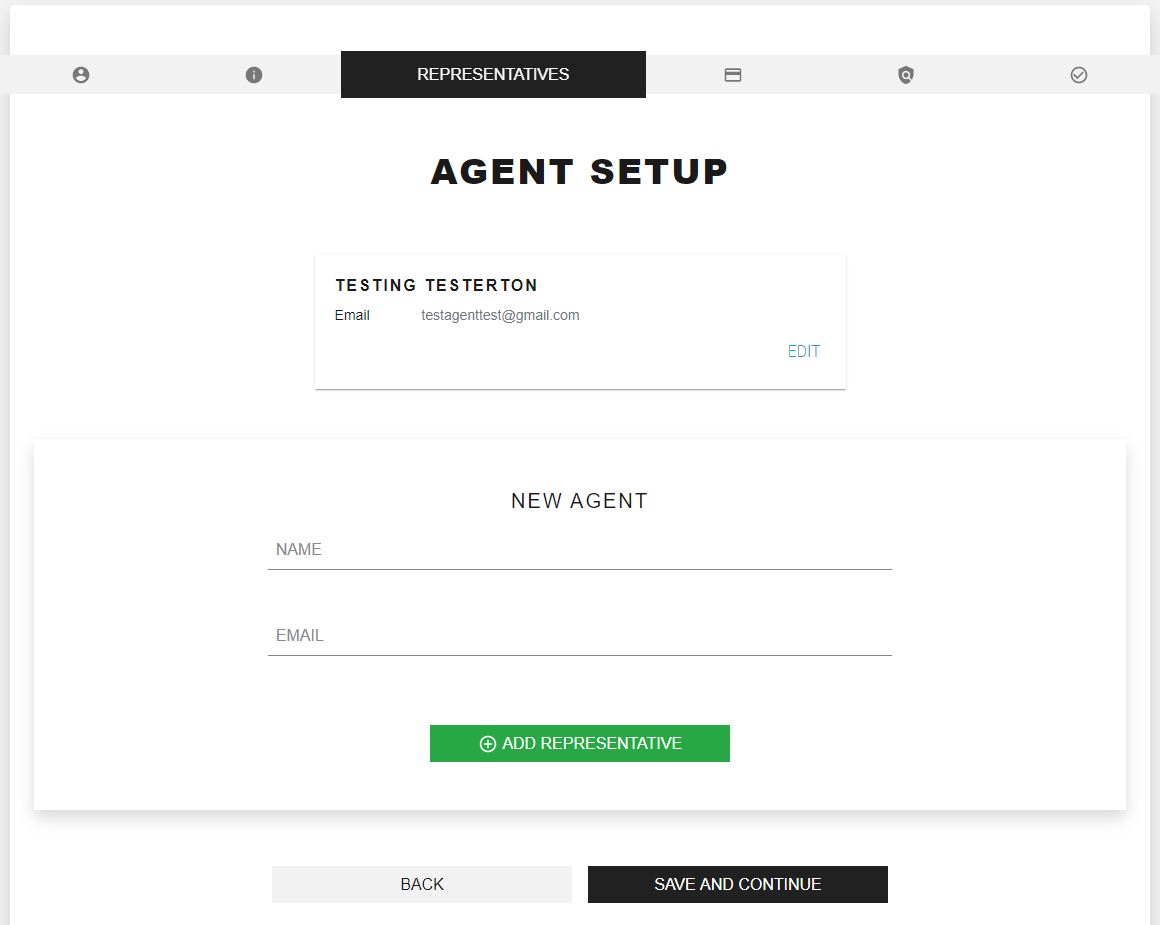
This is also where you'll add any agents (LOAs) if you have any who will be selling on your contract. Hit "Add Representative" to add an agent.
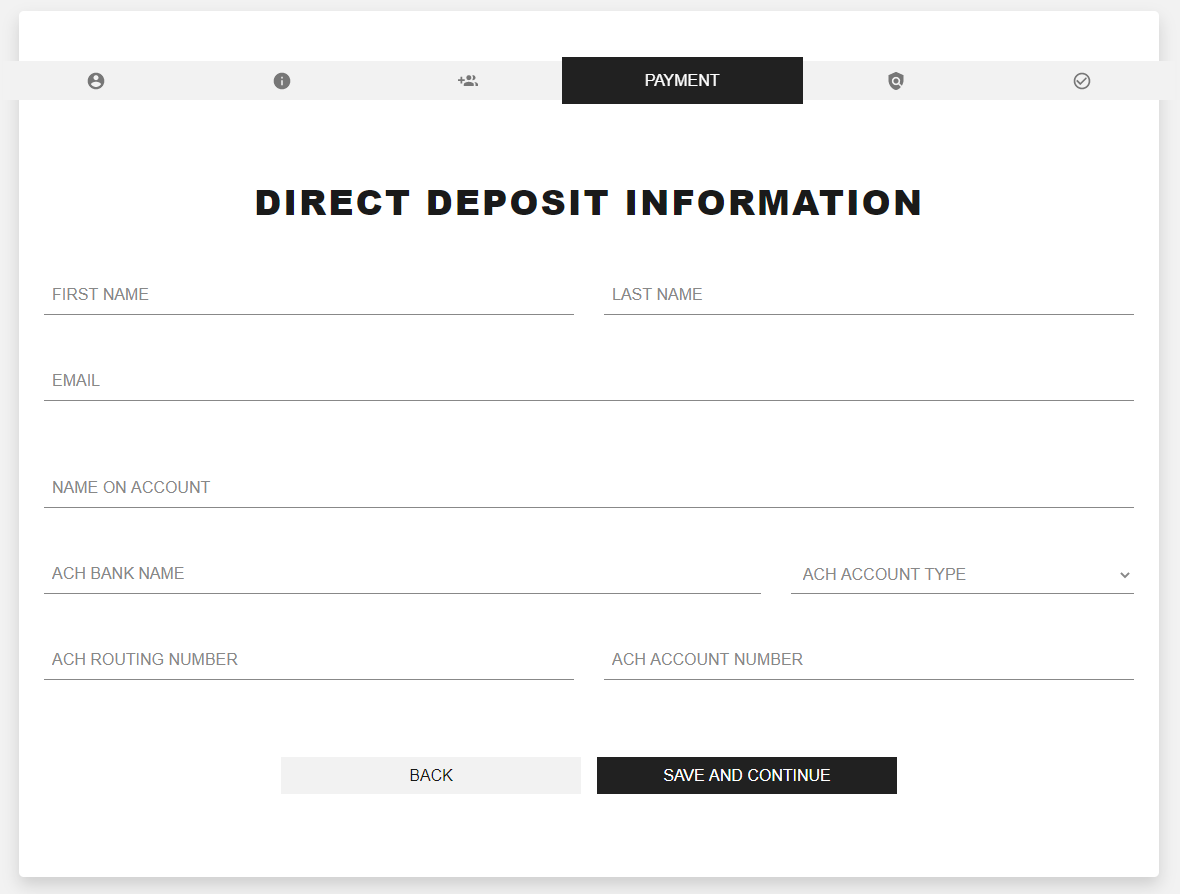
Step 4. This direct deposit information is where your commission will be entered for you to receive compensation. Please fill out all fields and select save and continue.
Step 5. Each contract below is required to sign. Please download, print, sign, scan, and upload the Ameritas Appointment contract only. Please digitally sign the remaining contracts, Direct Deposit Authorization, W-9, and Agent Agreement by hitting "open".
Note- Please enter the same direct deposit information you had entered previously into the direct deposit agreement you'll have to sign below.
.png)
After hitting "open" this is what will appear. Please feel out each field and sign. Hit "finalize" at the top.
.png)
Below is what step 5 should look like once completed. Hit continue.
.png)
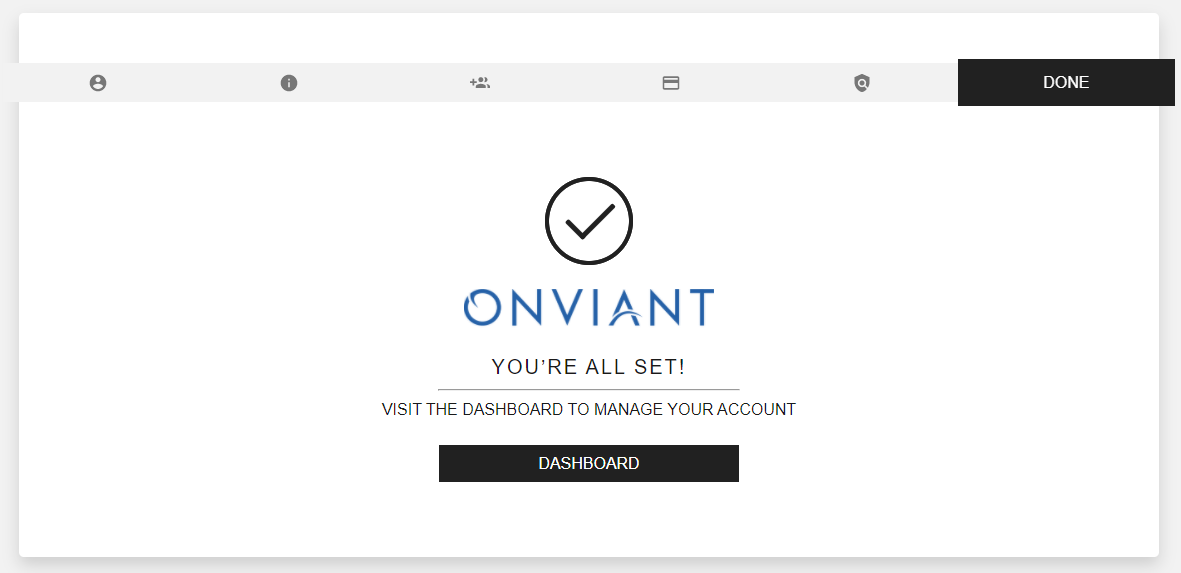
And you're all done with signup! This is what the completed sign up process should look like. Hit the dashboard button to access your personalized agent dashboard.
This is your agent dashboard. Here are some helpful tools:
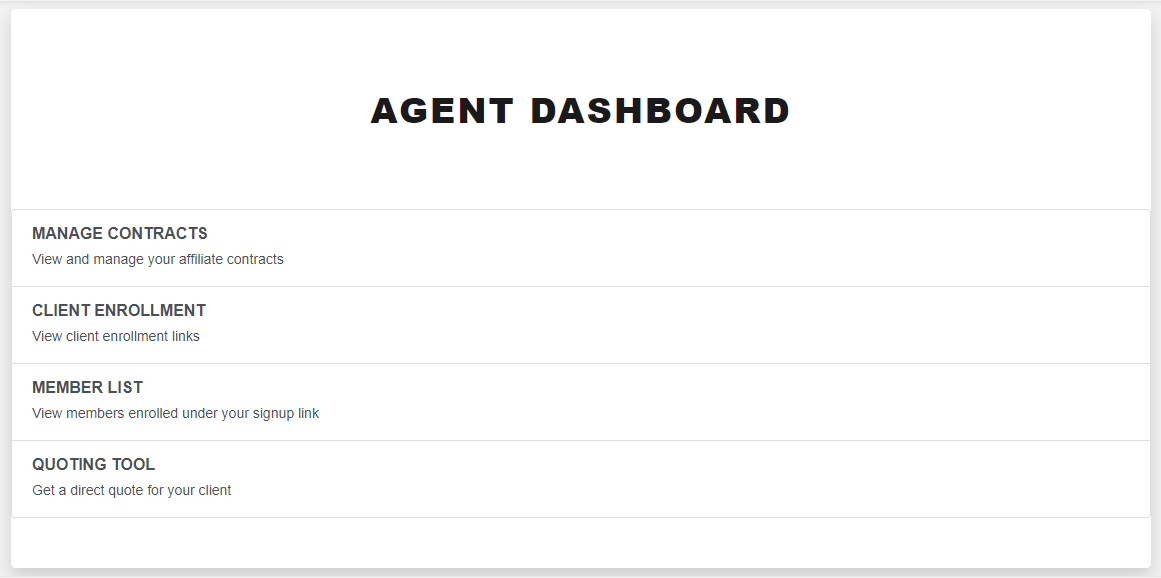
MANAGE CONTRACTS- this will give you access to the link to send to any sub-affiliates to sign up as an agent under you, it also allows you to add additional agents or LOAs who will be selling on your contract. This also gives you the options to upload missing electronic agreements that need to be signed. Lastly, this is where you can change/update your agency information if needed.
CLIENT ENROLLMENT- this provides you with the link to send clients to sign up/get enrolled independently.
MEMBER LIST- Once any client has completed their enrollment this is where you will see their information. This will show you their status, (active, terminated, etc.) member name (client name), member number, agent that signed them up, the plan they selected, the tier they selected, effective date for plan, term date (if applicable), their monthly rate, and list bill (group number).
QUOTING TOOL- This is where you can both quote a a price for a client as well as complete an entire enrollment for a client.